Guinness and Chocolate Cake
A friend asked me for this recipe, so here it is. Sorry it is imperial for you metric people out there.
7 fl oz Guinness
6 oz plain flour
2 medium eggs beaten
10 oz dark soft brown sugar
2 oz cocoa powder
4 oz butter
1/4 tsp baking powder
1 level tsp bicarbonate of soda
Method
1 Preheat the oven to gas mark 4 ( 180 deg C, 350 deg F)
2 Grease two non stick, 8 inch baking tins. Line base with baking parchment
3 Cream butter and sugar together in a large bowl, then gradually beat in the eggs
4 In a second bowl, sift the flour, baking powder and bicarbonate of soda
5 Sift the cocoa into a 3rd bowl and mix in the Guinness
6 Fold a dollop of cocoa mixture into the butter / sugar followed by an equal amount of flour mixture. Repeat until completely mixed.
7 Spread mixture into the two tins and bake for 30-35 minutes. Leave to cool.
Alternatively I make this in one layer in a greased non stick 9” springform tin with the base lined with baking parchment and bake for 55-60 minutes. Cook two to make a really big cake!
Sandwich together with butter icing and enjoy!
Filling
3 oz butter
6 oz icing sugar
vanilla extract
Cream together sugar and butter, add vanilla extract to taste. If too stiff, add a little warm water ( 1 or 2 tsps) from the kettle to loosen.
Coating if you want to be really decadent
8oz good quality chocolate
2 oz butter
Melt together in a bowl over a pan of hot water then spread over cake and allow to set.
Tuesday, 15 January 2013

Tuesday, 2 October 2012
My Chicken and Capsicum Curry
I always buy a whole chicken and joint, fillet and skin it myself, since it is much cheaper that way. After using some of the chicken in another dish I ended up with about 1kg of skinned and boned chicken breast. I also had a pack of three mixed peppers in the fridge that were starting to look as if they needed using up. I could have made a version of Basque Chicken or Puerto Rican Chicken but my mind was set on curry. I couldn’t find a recipe for chicken and pepper curry so I had to improvise.
This is my version and it was very tasty.
1kg skinless chicken pieces ( breast or thigh with or without bone)
2 tbsp vegetable oil
5 cloves garlic roughly chopped
Fresh ginger root approx 50x25x25 mm skinned and roughly chopped
Medium onion sliced
3 (bell) peppers of mixed colours sliced
Tomato purée 2 large heaped tbsps
1 tsp turmeric
1 tsp ground cumin
1 tbsp ground coriander
¼ tsp ground cinnamon
½ tsp mild chilli powder or to taste
1 tsp panch phoran (optional)
1 tsp garam masala
Pinch salt
Fresh coriander (cilantro) to garnish
Purée the garlic and ginger in a processor or mortar with a little water to loosen.
Heat the oil in a large pan and brown the chicken pieces on all sides. Remove the chicken from the pan and set aside. Add the onion and peppers to the pan and sweat gently, covered for 5 to 10 minutes until softened. Add the ground spices together with the panch phoran and fry off for a few seconds, then add the garlic and ginger paste together with the tomato purée and a little water if necessary. Continue to cook this mix, stirring frequently, until the oil starts to appear on the edges, ( about 5 minutes or so) that is difficult to explain but you will recognise it when it happens. Return the meat to the pan with enough water to form a gravy and almost cover the meat. Cover the pan and cook on a low heat for about 30 minutes until the chicken is fully cooked.
Garnish with roughly chopped fresh coriander and serve with plain boiled rice.
Monday, 6 August 2012
Not Chicken Balti
This recipe started off as a Balti sauce in a Slimming World book, but I didn't have all the ingredients so I improvised. In the end I had a very tasty curry. What follows is my version and it is nothing like a Balti.
Ingredients
8 chicken thighs, skin removed but left on the bone and slashed across a couple of times to allow the sauce to penetrate. You could use boneless if you wish.
1 whole garlic bulb, skinned. Yes, I do mean a whole bulb or head, not a clove.
5 cm piece of fresh ginger, peeled and chopped
1 red chilli, 1 green chilli ( They weren't very hot so I left the seeds in)
1 large or 2 medium onions peeled and quartered
A little water
2 tsp ground coriander
1tsp ground black mustard seeds or 1 tsp mustard powder
1tsp ground cumin
1tsp ground cinnamon
1 tsp paprika
1 tsp turmeric
1 tsp fenugreek seeds
3 whole cloves
3 green cardamom pods lightly crushed
1 tin chopped tomatoes
Fresh coriander (cilantro) would have been good
Method
Put the garlic, ginger, onion and chillies in a food processor and blend to a smooth paste, add a little water as necessary to help it along.
Fry the paste in a large pan in a little sunflower oil for about 5 minutes. Add the ground and whole spices and stir in the tomatoes. Add the chicken thighs and bring to the boil stirring occasionally. Lower the heat, cover and simmer for 40 minutes stirring occasionally.
If you are lucky enough to have some fresh coriander, add a small handful of roughly chopped leaves just before serving.
I just served it with plain boiled rice. I allow 1/2 cup of uncooked good quality basmati rice per person. Don't be tempted to buy easy cook rice or poor quality rice. The good stuff has a beautiful fragrance and texture.
Ingredients
8 chicken thighs, skin removed but left on the bone and slashed across a couple of times to allow the sauce to penetrate. You could use boneless if you wish.
1 whole garlic bulb, skinned. Yes, I do mean a whole bulb or head, not a clove.
5 cm piece of fresh ginger, peeled and chopped
1 red chilli, 1 green chilli ( They weren't very hot so I left the seeds in)
1 large or 2 medium onions peeled and quartered
A little water
2 tsp ground coriander
1tsp ground black mustard seeds or 1 tsp mustard powder
1tsp ground cumin
1tsp ground cinnamon
1 tsp paprika
1 tsp turmeric
1 tsp fenugreek seeds
3 whole cloves
3 green cardamom pods lightly crushed
1 tin chopped tomatoes
Fresh coriander (cilantro) would have been good
Method
Put the garlic, ginger, onion and chillies in a food processor and blend to a smooth paste, add a little water as necessary to help it along.
Fry the paste in a large pan in a little sunflower oil for about 5 minutes. Add the ground and whole spices and stir in the tomatoes. Add the chicken thighs and bring to the boil stirring occasionally. Lower the heat, cover and simmer for 40 minutes stirring occasionally.
If you are lucky enough to have some fresh coriander, add a small handful of roughly chopped leaves just before serving.
I just served it with plain boiled rice. I allow 1/2 cup of uncooked good quality basmati rice per person. Don't be tempted to buy easy cook rice or poor quality rice. The good stuff has a beautiful fragrance and texture.
Saturday, 28 July 2012
Green Lentils
Green Lentils
I like this served as an accompaniment to a pan fried piece of salmon, but I’m sure it would go with other fish and meats. In fact I could eat it on its own, straight out of a bowl, with some nice crusty bread just as comfort food.
Ingredients:
1 cup of dried green lentils, Puy lentils or lentilles vertes, washed and drained
3 cups cold water
1 medium onion finely chopped
1 carrot finely diced
1 stick celery finely diced
1 bay leaf
1 bouquet garni sachet
Vegetable or chicken stock cube
Put all the ingredients apart from the stock cube in a suitable saucepan and bring to the boil, turn down and simmer uncovered for about 20 to 30 minutes or until the lentils and vegetables are tender but still retain their shape. Towards the end of cooking add the crumbled stock cube and season to taste with freshly ground black pepper.
Warning. May cause flatulence but it’s worth it.
Monday, 25 June 2012
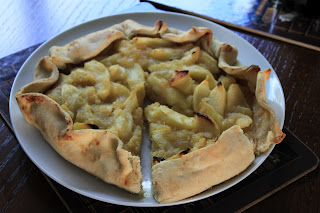
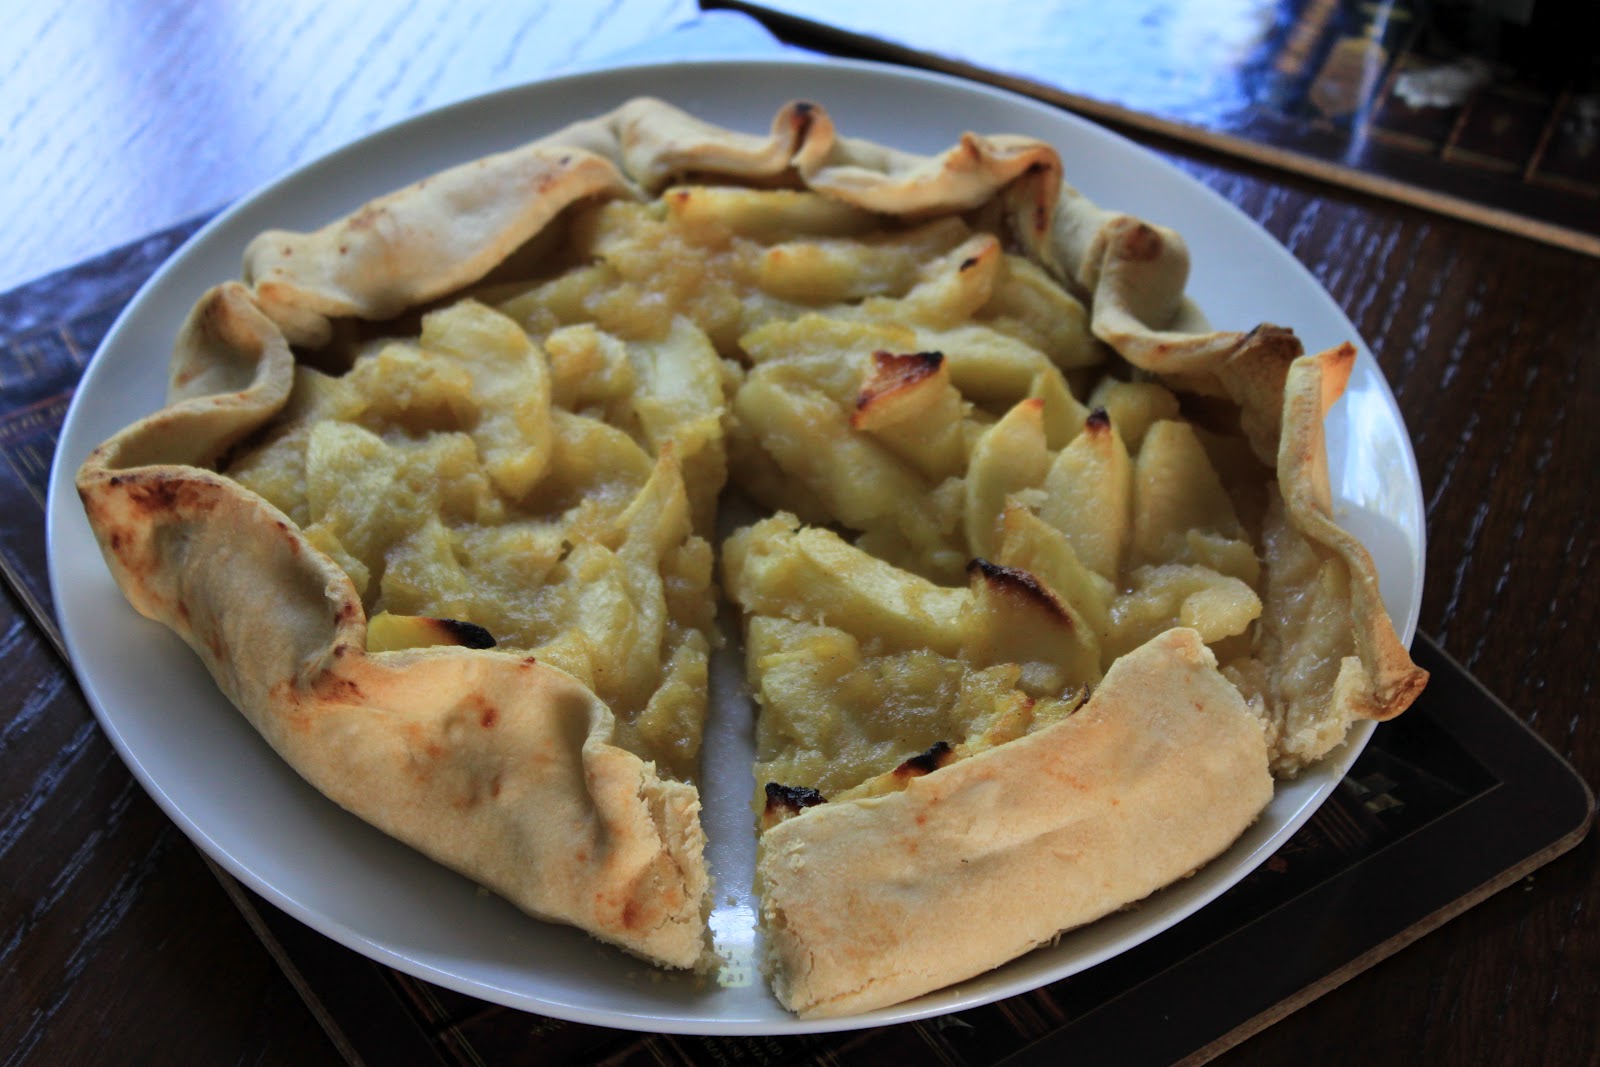
Tarte aux Pommes
Apple Tart to you and me.
I found the basic recipe in an old cookery book and it is one of the easiest pastry based puddings to make ever. You do not even need a cake tin or pie dish and you don't need to blind bake the case. I added some spice to the recipe because I find cooked apples bland but they are not essential. I also used a mixture of apples to get a variety of texture in the filling.
Pastry base
Ingredients
225g plain flour
pinch of salt
50g butter and 50g lard, or all butter if lard offends you
about 3 tbsps cold water
Whizz the flour salt and fats in a food processor until they resemble bread crumbs, add the water with the processor running, until it comes together in a ball. Remove from the processor, wrap in clingfilm and put in the fridge to chill.
OR buy a pack of ready made short crust pastry, you need about 350g
Filling
Ingredients
900g apples, about half and half Bramleys and eating apples, peeled, cored and cut into pieces about 5mm thick
Juice of 1/2 lemon
55g caster sugar
40g butter
2 whole cloves (optional)
1/4 tsp ground cinnamon (optional)
Put the sliced apple in a large frying pan, sprinkle with the lemon juice, add the cloves, mix the cinnamon with the sugar and sprinkle over and stir it all together. Add the butter around the side of the pan and cook over a low heat for about 12 minutes stirring frequently but gently until the Bramley apple has turned to pulp and the eating apples are cooked but still keeping their shape. Remove from the heat and set aside.
When the filling is cool. Pre-heat the oven to 190 deg C/375F/Gas Mk 5
Lightly grease and flour a baking sheet. Roll the pastry to a 30cm round and cut to shape. I used a dinner plate as a guide and guestimated the extra. Transfer the pastry to the baking sheet. Spoon the apple mixture into the middle of the pastry, leaving a 5cm border all round. (remove the cloves if you wish). Turn up the pastry border over the outer apples all the way around. Bake in the centre of the oven for 35 - 40 minutes until the pastry is crisp and brown and the apples lightly caramelised.
Serve warm with cream or ice cream

I found the basic recipe in an old cookery book and it is one of the easiest pastry based puddings to make ever. You do not even need a cake tin or pie dish and you don't need to blind bake the case. I added some spice to the recipe because I find cooked apples bland but they are not essential. I also used a mixture of apples to get a variety of texture in the filling.
Pastry base
Ingredients
225g plain flour
pinch of salt
50g butter and 50g lard, or all butter if lard offends you
about 3 tbsps cold water
Whizz the flour salt and fats in a food processor until they resemble bread crumbs, add the water with the processor running, until it comes together in a ball. Remove from the processor, wrap in clingfilm and put in the fridge to chill.
OR buy a pack of ready made short crust pastry, you need about 350g
Filling
Ingredients
900g apples, about half and half Bramleys and eating apples, peeled, cored and cut into pieces about 5mm thick
Juice of 1/2 lemon
55g caster sugar
40g butter
2 whole cloves (optional)
1/4 tsp ground cinnamon (optional)
Put the sliced apple in a large frying pan, sprinkle with the lemon juice, add the cloves, mix the cinnamon with the sugar and sprinkle over and stir it all together. Add the butter around the side of the pan and cook over a low heat for about 12 minutes stirring frequently but gently until the Bramley apple has turned to pulp and the eating apples are cooked but still keeping their shape. Remove from the heat and set aside.
When the filling is cool. Pre-heat the oven to 190 deg C/375F/Gas Mk 5
Lightly grease and flour a baking sheet. Roll the pastry to a 30cm round and cut to shape. I used a dinner plate as a guide and guestimated the extra. Transfer the pastry to the baking sheet. Spoon the apple mixture into the middle of the pastry, leaving a 5cm border all round. (remove the cloves if you wish). Turn up the pastry border over the outer apples all the way around. Bake in the centre of the oven for 35 - 40 minutes until the pastry is crisp and brown and the apples lightly caramelised.
Serve warm with cream or ice cream

Tuesday, 7 February 2012
Rescuing Soft Brown Sugar
If, like me, you find that your part used bag of soft brown sugar now resembles something more like the Rock of Gibraltar. Do not despair, do not throw it away, try this. Stand the open bag of sugar in a large polythene food bag, dampen a sheet of kitchen paper and put that alongside in the polythene bag. Seal the top of the poly bag and leave for 24 hours. Worked like magic. Rock returned to soft brown sugar.
Monday, 6 February 2012
Molly Cake
I made Molly Cake today. I'm not sure where I first heard about it, but a cake that contains no eggs, no fat and no added sugar sounded intriguing. I did a search on line and a number of recipes are listed. I decided to try this one, for no particular reason:
http://www.bbcgoodfood.com/recipes/7961/fat-free-gooey-molly-cake
Allegedly it is called Molly Cake or Molly's Cake after an elderly lady called Molly who gave the recipe to the National Trust at Cliveden.
I was a little sceptical about the ingredients, no eggs, no fat, no sugar didn't sound much like cake. There seemed to be far too much batter to put in a 2lb loaf tin and I had visions of it boiling over, but it didn't and the cake is truly delicious (if you love fruit cake). It is moist and very fruity with just the right amount of spice and has a really old fashioned weight about it. Certainly one I will be making again. Also it is very easy to make, but do not try to chop the dates in a food processor, they stick to the blades. Just cut them up roughly by hand.
http://www.bbcgoodfood.com/recipes/7961/fat-free-gooey-molly-cake
Allegedly it is called Molly Cake or Molly's Cake after an elderly lady called Molly who gave the recipe to the National Trust at Cliveden.
I was a little sceptical about the ingredients, no eggs, no fat, no sugar didn't sound much like cake. There seemed to be far too much batter to put in a 2lb loaf tin and I had visions of it boiling over, but it didn't and the cake is truly delicious (if you love fruit cake). It is moist and very fruity with just the right amount of spice and has a really old fashioned weight about it. Certainly one I will be making again. Also it is very easy to make, but do not try to chop the dates in a food processor, they stick to the blades. Just cut them up roughly by hand.
Monday, 30 January 2012
Fakes Soupa
This is a recipe for Greek lentil soup from Rena Salaman which I have adapted somewhat, the original contained 150 ml (¼ pint) of olive oil. It has been a family favourite in our house for about 20 years and is very tasty and filling.

250g Continental (Green) Lentils washed.
N.B. not Puy or Vert lentils but they would probably be ok
1 litre water
2 onions
2 cloves of garlic chopped
1 large or 2 medium carrots diced
2 sticks of celery diced
400g can of chopped tomatoes
1 tbsp light olive oil
1 tbsp dried oregano
2 Knorr vegetable stock cubes
Extra Virgin Olive oil to garnish (optional)
Put the lentils in a pan with water to cover generously, bring to the boil and boil for 3 minutes. Strain and dispose of the cooking water. Set aside.
In a separate large pan, sweat the diced onion, carrot, celery and garlic in the light olive oil over a low heat for about 10 minutes until the onions become translucent. Add the lentils and the remainder of the ingredients, crumble in the stock cubes and pour in the measured water. Bring to the boil then simmer for 30 to 40 minutes stirring occasionally until the lentils are soft. Season with ground black pepper and salt to taste.
Serve and garnish with a swirl of good Extra Virgin Olive oil if liked.
Tuesday, 24 January 2012
Holly Bell's biscuits
I made Holly Bell's biscuits today. They are absolutely delicious!
http://www.recipesfromanormalmum.com/2011/02/13/cherry-white-chocolate-and-apricot-oaty-biscuits-or-whatevers-in-your-cupboard-biscuits/

http://www.recipesfromanormalmum.com/2011/02/13/cherry-white-chocolate-and-apricot-oaty-biscuits-or-whatevers-in-your-cupboard-biscuits/

Tuesday, 17 January 2012
Cottage Pie
Sometimes only comfort food will do and one of my favourites is Cottage Pie. This is my version adapted from Delia Smith’s original recipe:
Serves 4 to 6
Filling:
500g minced (ground) beef
1 tbsp oil
2 medium onions chopped
2 carrots finely diced
1 clove of garlic finely chopped
½ tsp powdered cinnamon
½ tsp dried mixed herbs
1 tbsp chopped parsley
1 level tbsp plain flour
1 tbsp tomato purée
275 ml beef stock from cube or a Knorr beef stockpot
Salt and pepper
Topping:
Tomato (optional)
Mashed potatoes, made with plenty of added butter.
The pie filling can be made ahead of time. Brown the minced beef into a non-stick frying over a high heat, constantly turning and stirring the mince until it is no longer pink and the fat has come out. If there is a lot of fat, pour the mince into a sieve and set aside to drain over a bowl. If it is very low fat mince just set aside.
Gently sweat the onion, carrot and garlic in a large covered saucepan stirring occasionally until the onion is translucent , about 10 minutes. Add the mince, season with the salt and pepper and add Delia’s secret weapon, the cinnamon ( this is what makes this pie so special for me), the mixed herbs and parsley. Sprinkle the flour over the mixture and stir it in. Add the tomato purée and the stock and bring to the boil then simmer for 20 minutes. You can make this with minced cooked beef, which was probably the original version, in which case you will only need to simmer the filling for about 10 minutes.
This makes enough pie filling for three meals for us two when served with other vegetables, so I divide the mixture into 3 portions, freeze 2 and put one portion into a well buttered pie dish to cool. The dish I use for 2 people is approx. 15 cm diameter and 5 cm deep.
About half an hour before you are ready to eat, cover the filling with a single layer of thinly sliced tomato (optional) then with a good layer of mashed potato, roughen the top with a fork and put in a pre-heated hot oven Gas Mark 6, 200deg C, 400 deg F for about 25 minutes until golden brown.
You can sprinkle grated cheese over the topping before you bake it, or make the mash with 50/50 potato and celeriac, or swede and carrot, whatever you like. Serve with vegetables of your choice or just enjoy it on its own.
P.S. If you want to make Shepherd’s Pie, just substitute minced (ground) lamb for the beef.
Serves 4 to 6
Filling:
500g minced (ground) beef
1 tbsp oil
2 medium onions chopped
2 carrots finely diced
1 clove of garlic finely chopped
½ tsp powdered cinnamon
½ tsp dried mixed herbs
1 tbsp chopped parsley
1 level tbsp plain flour
1 tbsp tomato purée
275 ml beef stock from cube or a Knorr beef stockpot
Salt and pepper
Topping:
Tomato (optional)
Mashed potatoes, made with plenty of added butter.
The pie filling can be made ahead of time. Brown the minced beef into a non-stick frying over a high heat, constantly turning and stirring the mince until it is no longer pink and the fat has come out. If there is a lot of fat, pour the mince into a sieve and set aside to drain over a bowl. If it is very low fat mince just set aside.
Gently sweat the onion, carrot and garlic in a large covered saucepan stirring occasionally until the onion is translucent , about 10 minutes. Add the mince, season with the salt and pepper and add Delia’s secret weapon, the cinnamon ( this is what makes this pie so special for me), the mixed herbs and parsley. Sprinkle the flour over the mixture and stir it in. Add the tomato purée and the stock and bring to the boil then simmer for 20 minutes. You can make this with minced cooked beef, which was probably the original version, in which case you will only need to simmer the filling for about 10 minutes.
This makes enough pie filling for three meals for us two when served with other vegetables, so I divide the mixture into 3 portions, freeze 2 and put one portion into a well buttered pie dish to cool. The dish I use for 2 people is approx. 15 cm diameter and 5 cm deep.
About half an hour before you are ready to eat, cover the filling with a single layer of thinly sliced tomato (optional) then with a good layer of mashed potato, roughen the top with a fork and put in a pre-heated hot oven Gas Mark 6, 200deg C, 400 deg F for about 25 minutes until golden brown.
You can sprinkle grated cheese over the topping before you bake it, or make the mash with 50/50 potato and celeriac, or swede and carrot, whatever you like. Serve with vegetables of your choice or just enjoy it on its own.
P.S. If you want to make Shepherd’s Pie, just substitute minced (ground) lamb for the beef.
Friday, 6 January 2012
Green Pepper and Cashew Nut Risotto
I made a Spanish style chicken dish the other day which used red and yellow peppers, so having bought a pack of peppers, I had a green pepper that needed using, we also has some cashew nuts lurking about in the cupboard. I came up with this which was a great success
Enough for 2
Ingredients:
½ tbsp olive oil
1 cup risotto rice, (carnaroli or arborio)
1 green pepper, deseeded and finely sliced
1 banana shallot or ½ onion, finely chopped
1 clove garlic, finely chopped
50g raw cashew nuts
50g pumpkin seeds
50g frozen sweet corn kernels
50ml extra dry vermouth or dry white wine (optional)
1 litre hot vegetable stock made from 2 Knorr vegetable stock cubes
½ tbsp dark soy sauce
Salt and pepper to taste.
Have the hot stock gently simmering in a pan on an adjacent burner. Heat the oil in a large frying pan, add the shallot, pepper and garlic and fry gently for about 5minutes until soft . Add the rice and stir for a minute or so to ensure that the grains are coated with oil. Pour in the vermouth or wine and stir until the raw alcohol smell has disappeared and the pan is almost dry. Add a ladleful of the hot stock and keep stirring until it is absorbed by the rice and the rice is releasing its starch. This is what will make the risotto creamy. Add another ladle of stock and repeat the process. Keep doing this until the rice is cooked which will take about 20 minutes in total. About 5 minutes before it is ready, i.e. after 15 minutes of cooking the rice, add the cashew nuts, pumpkin seeds and sweet corn together with the soy sauce. Stir together, cook for the last 5 minutes ( adding more stock if necessary). Check the seasoning and serve. You will probably not need any salt since the soy sauce is very salty.
Enough for 2
Ingredients:
½ tbsp olive oil
1 cup risotto rice, (carnaroli or arborio)
1 green pepper, deseeded and finely sliced
1 banana shallot or ½ onion, finely chopped
1 clove garlic, finely chopped
50g raw cashew nuts
50g pumpkin seeds
50g frozen sweet corn kernels
50ml extra dry vermouth or dry white wine (optional)
1 litre hot vegetable stock made from 2 Knorr vegetable stock cubes
½ tbsp dark soy sauce
Salt and pepper to taste.
Have the hot stock gently simmering in a pan on an adjacent burner. Heat the oil in a large frying pan, add the shallot, pepper and garlic and fry gently for about 5minutes until soft . Add the rice and stir for a minute or so to ensure that the grains are coated with oil. Pour in the vermouth or wine and stir until the raw alcohol smell has disappeared and the pan is almost dry. Add a ladleful of the hot stock and keep stirring until it is absorbed by the rice and the rice is releasing its starch. This is what will make the risotto creamy. Add another ladle of stock and repeat the process. Keep doing this until the rice is cooked which will take about 20 minutes in total. About 5 minutes before it is ready, i.e. after 15 minutes of cooking the rice, add the cashew nuts, pumpkin seeds and sweet corn together with the soy sauce. Stir together, cook for the last 5 minutes ( adding more stock if necessary). Check the seasoning and serve. You will probably not need any salt since the soy sauce is very salty.
Saturday, 31 December 2011
Rumpy Pumpy Soup
In the Hairy Bikers' cookery book " Mums Know Best" there is a recipe intriguingly called Rumpy Pumpy Soup. It turns out that this is not what you may think but refers to the well known flatulence causing effect of lentils.
This is my version of a very tasty and economical soup
2 onions
3 carrots
2 sticks of celery
Add more or less any other veg you like, I had a leek and some raw swede left over so added that.
2 litres of chicken or vegetable stock
1 cup red lentils, washed
salt and pepper
Finely chop all the vegetables
Sweat off the onion carrots and celery in a little oil for about 5 minutes add the other vegetables, the lentils and the stock. Bring to the boil, stirring frequently to make sure the lentils don't stick to the bottom of the pan. Simmer until the lentils and vegetables are tender, about 30 minutes. Season to taste. Either leave the soup as it is or whizz it up with a stick blender to form a smooth soup.
You could spice up the soup with curry powder or add left over ham or chicken, the possibilities are endless.
This is my version of a very tasty and economical soup
2 onions
3 carrots
2 sticks of celery
Add more or less any other veg you like, I had a leek and some raw swede left over so added that.
2 litres of chicken or vegetable stock
1 cup red lentils, washed
salt and pepper
Finely chop all the vegetables
Sweat off the onion carrots and celery in a little oil for about 5 minutes add the other vegetables, the lentils and the stock. Bring to the boil, stirring frequently to make sure the lentils don't stick to the bottom of the pan. Simmer until the lentils and vegetables are tender, about 30 minutes. Season to taste. Either leave the soup as it is or whizz it up with a stick blender to form a smooth soup.
You could spice up the soup with curry powder or add left over ham or chicken, the possibilities are endless.
Thursday, 29 December 2011
Holly Bell’s Cupcake Course
Back in October I became aware that Holly was running classes via a friend on Facebook. I’m not sure if I decided that I needed to get in touch with my feminine side or just wanted to meet Holly, who had really impressed me on the Great British Bake Off. Whatever the motive, I did book for the last course before Christmas on 13th December 2011.
I travelled by train to Market Harborough and stayed 2 nights in the Premier Inn just outside the town. I needed to book a taxi to the Bridge 67 Cookery School where the course is held, since it is somewhat off the beaten track and not accessible by public transport.
When I arrived at 9 a.m. I was warmly greeted by Holly and a friend who was helping run the day. Coffee was provided in the dining room above the kitchen, while the rest of the group arrived, together with croissants for those who were hungry. I had already eaten a full English breakfast so the coffee was enough for me. Introductions were made and we were all made to feel very welcome and put at our ease. Holly is a warm, open, friendly individual with a charming manner and gave no sense of considering herself to be a celebrity.
After the general house-keeping and safety chat, we moved down to the kitchen. There were only 5 of us on the course and Holly explained that she keeps the numbers low so that everyone gets the most out of the day. As the day progressed we made cupcakes and learnt to make really delicious butter icing and how to use fondant icing. Holly is a very good teacher and has structured the day so that each technique builds on a skill you have already used.
Before I attended the course, I did wonder how it could take so long to make 12 cupcakes, but the time just flew. We were kept supplied with drinks throughout the day and a very pleasant lunch was also provided.
I did have some difficulty getting my cakes home since the box provided is quite large and I did not take a big enough bag to hold the box horizontal. Fortunately my only luggage was a backpack so I did manage to get my cakes home more or less in one piece, via two taxis, three trains, a double-decker bus and a walk in the rain.
As my wife predicted, I was the only male in the class on the day I attended, but I felt very much at ease with Holly, her friend, and the other members of the group. I learnt some skills that I have already used at home and no doubt will use again in the future.

Saturday, 10 December 2011
Update
I haven't done much in the way of new dishes recently. I did make a mushroom risotto based on a Jamie Oliver recipe last week, using dried ceps and a selection of supermarket mushrooms. It was very tasty.
I was going to make a rabbit dish tonight from the Two Greedy Italians' Cookbook but our supermarket didn't have any polenta in stock. So I've reverted to Plan B. Bangers and Mash. That is always a good back-up.
I'm looking forward to meeting Holly next week and learning a few baking and cake decorating skills.
I was going to make a rabbit dish tonight from the Two Greedy Italians' Cookbook but our supermarket didn't have any polenta in stock. So I've reverted to Plan B. Bangers and Mash. That is always a good back-up.
I'm looking forward to meeting Holly next week and learning a few baking and cake decorating skills.
Tuesday, 22 November 2011
Pepper and Lentil Gratin
In keeping with my aim of cooking at least one vegetarian main course every week I made this old family favourite last night. We just ate it on its own and kept coming back for extra helpings so: Feeds 4 or 2 very hungry people
Prep 10 minutes Cook 60min
175g red split lentils
1 tbsp light olive oil
2 medium onions, 1 red, 1 brown if possible, chopped
1 clove garlic finely chopped
1 green pepper, deseeded and cut into approx. 1cm squares
1 red pepper, deseeded and cut into approx. 1cm squares
150g mushrooms sliced
½ tsp chilli powder or to taste
¼ tsp smoked paprika, optional
½ tsp sweet paprika
1 tbsp tomato ketchup
2 tbsp dark soy sauce
seasoning
Topping
25g panko breadcrumbs, or ordinary breadcrumbs
25g pine kernels
25g pumpkin seeds
25g cheddar cheese grated
25g parmesan grated
Pinch sea salt
Pinch cracked black pepper
Pre heat oven to Gas Mark 5, 190C
Wash and drain the lentils and add to 600ml of boiling water, return to the boil and simmer for about 20 minutes until tender. Drain in a sieve to remove any excess water.
In a large pan fry the onions and garlic gently in the olive oil for about 5 minutes until the onion is translucent but not browned. Add the peppers and the mushrooms, cover and sweat on a low heat for about 10 minutes. Add the lentils, spices, ketchup, and soy sauce, salt and pepper to taste. Stir well and put into a greased oven proof dish.
Mix together the ingredients for the topping and spread over the vegetable mixture. Bake in the centre of the oven for about 30 minutes.
Prep 10 minutes Cook 60min
175g red split lentils
1 tbsp light olive oil
2 medium onions, 1 red, 1 brown if possible, chopped
1 clove garlic finely chopped
1 green pepper, deseeded and cut into approx. 1cm squares
1 red pepper, deseeded and cut into approx. 1cm squares
150g mushrooms sliced
½ tsp chilli powder or to taste
¼ tsp smoked paprika, optional
½ tsp sweet paprika
1 tbsp tomato ketchup
2 tbsp dark soy sauce
seasoning
Topping
25g panko breadcrumbs, or ordinary breadcrumbs
25g pine kernels
25g pumpkin seeds
25g cheddar cheese grated
25g parmesan grated
Pinch sea salt
Pinch cracked black pepper
Pre heat oven to Gas Mark 5, 190C
Wash and drain the lentils and add to 600ml of boiling water, return to the boil and simmer for about 20 minutes until tender. Drain in a sieve to remove any excess water.
In a large pan fry the onions and garlic gently in the olive oil for about 5 minutes until the onion is translucent but not browned. Add the peppers and the mushrooms, cover and sweat on a low heat for about 10 minutes. Add the lentils, spices, ketchup, and soy sauce, salt and pepper to taste. Stir well and put into a greased oven proof dish.
Mix together the ingredients for the topping and spread over the vegetable mixture. Bake in the centre of the oven for about 30 minutes.
Monday, 21 November 2011
My take on Boeuf Burguignon
This was very nearly Beef Gonrong! As I said a couple of days ago, I read a number of recipes from different sources before deciding how to make this dish. When it was time to eat, the sauce was too thin and too acidic and the meat was edible but still a bit chewy. There was ample for two meals so the next day I boiled it up again then transferred the stew to my slow cooker and let it cook in there for about 4 hours on low. What a transformation! The meat held its shape but you could cut it with a fork. So what follows will be the way I intend to cook it next time:-
900g shin beef cut into 5cm chunks
150g streaky bacon cut across into approx 5mm wide strips
40g butter
Light olive oil
2 medium onions finely chopped
2 carrots about 5mm dice
3 cloves garlic finely chopped
2 cups red wine
2 cups beef stock from cube or Knorr Stockpot
Heaped tbsp tomato purée
2 bay leaves
Pinch smoked pimento ( optional)
Bouquet garni sachet
200g button mushrooms or closed cup mushrooms quartered
12 round shallots peeled
Handful of chopped parsley
Plain flour
Salt and pepper.
Serves 4 - 6 people
This is a long process and cannot be rushed. Preparation time about 15 minutes. Cooking time about 7 hours.
Shin beef contains lots of connective tissue, which increases the flavour but needs long slow cooking to become tender. Make sure that the wine you use, if not Burgundy, would still be wine you would be happy to drink. If you don’t want to use wine you could use beer or stout. It will not be Boeuf Bourguignon but it will still be very tasty.
Put some plain flour on a plate and season with pepper. Coat the pieces of beef in the flour and shake off the excess.
Heat a little oil in a large pan approx. 23cm dia. Add the bacon pieces and fry over a low heat until golden. Remove with a slotted spoon and set aside. Increase the heat slightly and add the pieces of beef to the pan and brown on all sides then remove these also and set aside. Do not crowd the pan and brown the meat in batches, you want to get some colour on the meat not stew it.
Pour off any excess fat, then melt 20g of the butter and add the chopped onions, garlic and carrots with the pinch of pimento if used. Stir well, reduce the heat to low, cover the pan and sweat the vegetables for about 5 minutes until the onion is translucent.
Add a little of the wine to the pan and with a wooden spoon scrape the bottom of the pan to remove any crusty bits or particles stuck to the bottom. Add a bit more wine if it evaporates before you finish. Add the rest of the wine, tomato purée, bouquet garni, half the mushrooms and the bay leaves then bring to the boil.
Return the beef and bacon to the pan together with any juices and add enough stock to just cover the meat and vegetables. Bring back to the boil then transfer the contents of the pan to a slow cooker. Cover the surface of the stew with a cartouche of greaseproof paper and cook on slow for about 6 hours or until the meat is really tender.
Heat half the remaining butter in a frying pan with a little olive oil to stop it from burning and gently fry the whole shallots until golden brown. Remove and set aside. In the same pan add the last of the butter and sauté the mushrooms until golden and set aside with the shallots.
About half an hour before you want to eat transfer the stew back to the original sized pan. Remove the bay leaves and bouquet garni. Add the shallots, mushrooms and chopped parsley, reserving some parsley for garnish and cook for a further 30 minutes.
Check and correct the sauce consistency, seasoning and acidity. Serve with potato and celeriac mash or boiled potatoes and seasonal vegetables.

Sunday, 20 November 2011
When things go wrong
When I started this blog, one of my aims was to encourage more people to cook from scratch. Obviously we can’t all be Michel Roux, Raymond Blanc or a domestic god(dess) and things do go wrong. We all have culinary disasters or near misses. I think the important thing to realise is that if we could all cook perfect dishes at the first attempt then life would be too easy. There would be no sense of achievement at mastering a tricky dish or even putting a plate of edible food on the table.
Recently I have cooked two dishes which have been too acidic. One was a dish I have made countless times before without a problem and the other was from recognised recipes, even though I adapted the version I made. In neither case did I add or subtract ingredients which would have affected the acidity of the dish.
In the case of the ragu I corrected the acidity by adding sugar. The other dish was the beef stew, and I did not really want to add sugar. After some research on the Internet, the suggested solution was to add a small amount of baking soda ( sodium bicarbonate). This caused the stew to foam like a fermenting bed of lava. Once this initial reaction had occurred I was able to taste, then add a little more bicarb until I was happy with the result. I think it would be important to add a small amount at a time otherwise it could become too salty. Remember the old adage, you can add but you can’t take away.
Recently I have cooked two dishes which have been too acidic. One was a dish I have made countless times before without a problem and the other was from recognised recipes, even though I adapted the version I made. In neither case did I add or subtract ingredients which would have affected the acidity of the dish.
In the case of the ragu I corrected the acidity by adding sugar. The other dish was the beef stew, and I did not really want to add sugar. After some research on the Internet, the suggested solution was to add a small amount of baking soda ( sodium bicarbonate). This caused the stew to foam like a fermenting bed of lava. Once this initial reaction had occurred I was able to taste, then add a little more bicarb until I was happy with the result. I think it would be important to add a small amount at a time otherwise it could become too salty. Remember the old adage, you can add but you can’t take away.
Beurre Manié
The unconventional Bouef Bourguignon cooking method worked well but the gravy was too thin. I did not want to use cornflour (corn starch) to thicken the gravy so I used beurre manié. This consists of equal quantities of soft butter and plain flour mixed together to form a dough which looks rather like marzipan. Pieces of this can be stirred into the sauce without any danger of lumps. Because the flour is raw you need to keep stirring for a few minutes to cook it out.
Friday, 18 November 2011
Bangers and Bourguignon
Yesterday I made straight forward bangers and mash, using some of Nick Brown's excellent traditional pork sausages. They were very meaty and filling, not full of bread and water, two sausages each were ample for us. I know it's not healthy, slimming or clever but the secret of good mash is to add plenty of butter. I understand that one should not add cold milk when making mash so I generally drain the potatoes in a colander, then pour a little milk into the bottom of the hot pan, return the potatoes, add butter and mash together with some salt and pepper. If I still need to loosen the mash I do add additional cold milk and it seems OK to me.
When I was at the butcher's I also bought 1kg of shin beef which needs long slow cooking so I decided to make Bouef Bourguignon. There seems to be as many recipes as there are cooks, some add tomatoes, some don't, some cook it in the oven, some don't. I'm combining what sounds the best to me and am adapting it so it will cook while I'm having a few pints. Then I will only have to finish it off when I get home. I've cooked the bacon, browned the meat and vegetables, added the wine and stock, herbs etc. and put it in a casserole in the oven. I've covered the top of the stew with a piece of greaseproof paper to stop the surface from drying out. The oven is set to automatic so it will just be a case of adding the small onions ( I'm substituting shallots), and button mushrooms when I come home. I've already sauteed the onions and mushrooms and they are in a bowl covered with cling film waiting to be added. Hope it works
When I was at the butcher's I also bought 1kg of shin beef which needs long slow cooking so I decided to make Bouef Bourguignon. There seems to be as many recipes as there are cooks, some add tomatoes, some don't, some cook it in the oven, some don't. I'm combining what sounds the best to me and am adapting it so it will cook while I'm having a few pints. Then I will only have to finish it off when I get home. I've cooked the bacon, browned the meat and vegetables, added the wine and stock, herbs etc. and put it in a casserole in the oven. I've covered the top of the stew with a piece of greaseproof paper to stop the surface from drying out. The oven is set to automatic so it will just be a case of adding the small onions ( I'm substituting shallots), and button mushrooms when I come home. I've already sauteed the onions and mushrooms and they are in a bowl covered with cling film waiting to be added. Hope it works
Thursday, 17 November 2011
Chana Dal
Last night I de-frosted a North Indian Chicken curry which needed something extra to make a meal so I cooked chana dal.
Chana Dal, also spelt Channa Dal or Channa Dhall is split yellow gram, a type of chick pea and makes a fantastic accompaniment to a meat curry or can be a nutritious vegetarian meal in its own right.
Enough for four as an accompaniment or two as the main dish
1 cup chana dal
1 onion chopped quite finely
2 tbsp dessicated coconut
1 tsp ground turmeric ( haldi)
1 tsp chilli powder or to taste
pinch asafoetida (hing) Optional
1 tsp garam masala
1/2 tsp black mustard seed
1/2 tsp cumin seed (jeera)
1 tbsp ground nut oil
Pick over, wash and drain the dal. Put 3 cups of boiling water in a large pan and return to the boil then add the dal and boil for 5 minutes. Add the onion, dessicated coconut, chilli powder, turmeric and asafoetida. The asafoetida is reputed to reduce the flatulence content of pulses. Reduce the heat and simmer until the dal is soft, about 30 to 40 minutes, mix in the garam masala and salt to taste. I am told that you should not add the salt earlier or the dal will stay hard. Keep an eye on the pan towards the end of cooking and make sure that the dal does not catch on the bottom of the pan.
Heat the ground nut oil in a small frying pan and add the mustard and cumin seeds. As soon as the seeds begin to pop, pour the contents of the frying pan into the dal and stir. Cook for a few more minutes then serve with rice, naan or chapattis.
Chana Dal, also spelt Channa Dal or Channa Dhall is split yellow gram, a type of chick pea and makes a fantastic accompaniment to a meat curry or can be a nutritious vegetarian meal in its own right.
Enough for four as an accompaniment or two as the main dish
1 cup chana dal
1 onion chopped quite finely
2 tbsp dessicated coconut
1 tsp ground turmeric ( haldi)
1 tsp chilli powder or to taste
pinch asafoetida (hing) Optional
1 tsp garam masala
1/2 tsp black mustard seed
1/2 tsp cumin seed (jeera)
1 tbsp ground nut oil
Pick over, wash and drain the dal. Put 3 cups of boiling water in a large pan and return to the boil then add the dal and boil for 5 minutes. Add the onion, dessicated coconut, chilli powder, turmeric and asafoetida. The asafoetida is reputed to reduce the flatulence content of pulses. Reduce the heat and simmer until the dal is soft, about 30 to 40 minutes, mix in the garam masala and salt to taste. I am told that you should not add the salt earlier or the dal will stay hard. Keep an eye on the pan towards the end of cooking and make sure that the dal does not catch on the bottom of the pan.
Heat the ground nut oil in a small frying pan and add the mustard and cumin seeds. As soon as the seeds begin to pop, pour the contents of the frying pan into the dal and stir. Cook for a few more minutes then serve with rice, naan or chapattis.
Subscribe to:
Posts (Atom)